

Understanding VR Headsets and DIY Potential
What is a VR Headset? – Overview of virtual reality technology and components
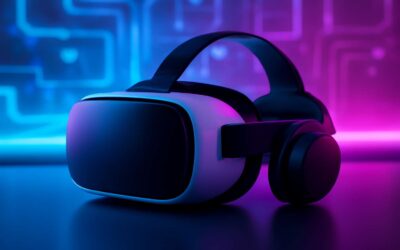
Within the realm of cutting-edge innovation, the VR headset stands as a portal to worlds unseen, a vessel that transports users beyond the confines of reality. At its core, a VR headset is a symphony of intricate components—high-resolution displays, motion sensors, and immersive audio—that work harmoniously to create the illusion of presence. This technology is not merely a gadget but a gateway to adventures, learning, and creativity, all woven into a wearable tapestry of digital magic.
For those captivated by the allure of virtual worlds, the concept of a vr headset diy beckons with the promise of mastery and personalization. Crafting your own VR headset involves understanding the fundamental elements—lenses that manipulate perspective, tracking systems that respond to movement, and compatible hardware that brings it all to life. The potential for a diy project is vast, inviting enthusiasts to transform everyday materials into a sophisticated portal to new dimensions.
In the quest to decode the mysteries of VR technology, exploring the components that make up a vr headset diy reveals a fascinating landscape. From simple goggles to fully integrated systems, each part contributes to the seamless illusion of reality. With a dash of ingenuity and a pinch of technical curiosity, anyone can embark on this journey—unveiling the magic hidden within the circuitry and design of a virtual reality device.
Reasons to Build a DIY VR Headset – Cost savings, customization, educational benefits
Understanding VR headsets is crucial before diving into a vr headset diy project. These devices combine optical lenses, motion sensors, and display screens to create immersive experiences. Building your own allows you to grasp the technology behind virtual reality and customize it to suit your needs. Many enthusiasts see it as a rewarding challenge that enhances their understanding of digital hardware.
One of the biggest reasons to build a vr headset diy is cost savings. Commercial models can be expensive, but assembling one yourself offers a more budget-friendly alternative. Additionally, DIY projects allow for unparalleled customization—whether it’s adjusting the fit, integrating specific sensors, or choosing your preferred display technology. This flexibility turns a basic device into a personalized portal to new worlds.
Educational benefits are another compelling reason. Crafting a vr headset diy encourages problem-solving and technical learning, making it perfect for students and hobbyists alike. Plus, it provides a hands-on approach to understanding virtual reality’s core components. For many, creating their own VR headset isn’t just a project; it’s a pathway to mastery in digital innovation.
Challenges and Limitations – Technical complexity, hardware constraints
Understanding VR headsets is essential before embarking on a vr headset diy journey. These devices are marvels of modern engineering, seamlessly blending optical lenses, motion sensors, and high-resolution displays to craft immersive virtual worlds. But it’s not just about the components; it’s about grasping how they work together to create a convincing sense of presence. This knowledge transforms a simple project into a gateway for innovation and mastery over digital hardware.
However, tackling a vr headset diy isn’t without its hurdles. The technical complexity is significant, requiring a solid grasp of electronics, coding, and optics. Hardware constraints can also limit what’s feasible—whether it’s the size of the display or the precision of motion sensors. For example, finding the right balance between lightweight comfort and robust internal components is a challenge that demands ingenuity.
- Limited availability of specialized parts
- Difficulty in calibration for smooth tracking
Building a VR headset yourself is an exciting pursuit, but it’s not a task for the faint-hearted. It’s a project that demands patience, meticulous troubleshooting, and a willingness to learn from failures. Yet, for those who press on, the reward is a deeper understanding of virtual reality’s core technologies and a custom device tailored perfectly to personal needs. The allure of crafting a vr headset diy lies in transforming technical challenges into a personalized portal to new digital realms.
Essential Components for a DIY VR Headset
Display Technologies – LCD, OLED, AMOLED options
Choosing the right display technology is the heartbeat of any vr headset diy project. The display isn’t just a screen; it’s the window into your immersive universe. Options like LCD, OLED, and AMOLED each bring their own flavor of visual magic, and understanding their quirks can make or break your DIY VR experience.
LCD screens are the trusty workhorses—cost-effective and widely available, but often with slower response times and less vivid contrast. OLED and AMOLED displays, on the other hand, offer breathtaking color depth and near-instant response times, making them the darling choices for anyone serious about realism. These display technologies provide the pixel-perfect clarity that can turn a mediocre VR experience into something truly mesmerizing.
When selecting a display for your vr headset diy, consider factors like refresh rate, resolution, and power consumption. A high refresh rate (at least 90Hz) ensures smooth visuals, which is essential for reducing motion sickness and enhancing comfort. The choice of display technology directly impacts the overall quality, so pick wisely—after all, you’re building a portal to another dimension!
Lenses for VR – Types of lenses and their impact on immersion
In the realm of VR headset DIY projects, lenses are the unsung heroes that transform a simple display into a portal of wonder. The right choice of lenses can dramatically elevate immersion, making virtual worlds feel tangible and real. From wide-angle to fresnel, each type of lens influences how you perceive depth, field of view, and clarity, shaping your VR journey in subtle yet profound ways.
Fresnel lenses, for example, are lightweight and cost-effective, perfect for those seeking a compact and affordable VR headset DIY. They provide a broad field of view but can sometimes introduce glare or halo effects. Conversely, aspheric lenses offer sharper edges and minimal distortion, creating a seamless visual experience that pulls you deeper into the virtual universe. The choice hinges on what you prioritize—whether it’s maximum immersion or simplicity of assembly.
Understanding the impact of lenses on VR immersion is crucial. The right lenses not only enhance visual fidelity but also reduce eye strain and motion sickness, key considerations in any VR headset DIY. By carefully selecting and customizing your lenses, you craft a more engaging, comfortable experience—truly making your DIY VR headset a masterpiece of virtual craftsmanship!
Head Mounting and Fit – Adjustable straps, padding, comfort considerations
Comfort and stability are the bedrock of an effective VR headset DIY experience. When crafting your own VR headset, paying close attention to head mountings and fit isn’t just about convenience—it’s about immersion itself. Adjustable straps are vital, allowing users to customize the fit for varying head sizes and shapes, ensuring the headset stays securely in place during extended virtual adventures. These straps should be durable yet lightweight, preventing unnecessary pressure points that could detract from comfort.
Padding serves as the interface between your face and the device, transforming a technical assembly into an ergonomic extension of your body. Soft foam or silicone padding not only cushions but also helps maintain a proper seal, reducing light leaks and enhancing visual clarity. The choice of padding material can significantly influence the overall experience, especially during long sessions. In a VR headset DIY project, prioritizing comfort considerations—such as breathability and adjustability—ensures that your creation can be worn for hours without discomfort.
For those embarking on a vr headset diy journey, incorporating a balanced combination of adjustable straps and plush padding creates a headset that fits like a second skin. This harmony between fit and comfort elevates immersion, making every virtual environment feel more real. Remember, a well-fitted headset isn’t just about ease of use—it’s about unlocking the true potential of virtual reality, one comfortable wear at a time!
Sensors and Tracking – Gyroscopes, accelerometers, external tracking systems
In the realm of vr headset diy, sensors and tracking components serve as the silent sentinels of immersion. Gyroscopes and accelerometers form the cornerstone of motion detection, translating the subtle shifts of your head into digital signals that the system interprets seamlessly. These tiny yet vital devices enable precise orientation and movement tracking, essential for creating a convincing virtual environment.
Beyond internal sensors, external tracking systems elevate the experience further. High-quality external cameras or infrared sensors can be integrated into your diy vr headset, capturing even the most delicate movements with remarkable accuracy. For those passionate about pushing boundaries, a combination of internal and external tracking—such as infrared beacons or external base stations—can unlock a new level of spatial awareness. This layered approach ensures that every twist, turn, and tilt feels natural and intuitive, transforming your DIY project into a portal that truly responds to your body’s language.
Incorporating these components into your vr headset diy demands careful selection and calibration. The harmony between gyroscopes, accelerometers, and external tracking systems creates a symphony of motion that elevates immersion from mere visual illusion to a visceral experience. Truly, the art of crafting a DIY VR headset lies in weaving these intricate sensors into a cohesive whole—each piece vital, each moment a step closer to virtual perfection.
Connectivity and Interfaces – HDMI, USB, wireless options
Connectivity and interfaces are the lifeblood of any vr headset diy project. Without reliable links between components, the immersive experience can quickly unravel. High-quality HDMI ports serve as the primary conduit for transmitting high-resolution visuals from your custom display to the headset, ensuring crisp, seamless images. Alongside HDMI, USB connections form the backbone for data transfer—handling everything from sensor inputs to controller signals. The versatility of USB interfaces allows for easy integration of additional peripherals, making your vr headset diy adaptable and future-proof.
For those seeking freedom from cables, wireless options open a whole new realm of possibilities. Wireless streaming technologies, such as Wi-Fi 6 or dedicated RF links, can transmit content and tracking data with remarkably low latency. This creates a truly untethered experience, vital for maintaining immersion during intense movements. When selecting connectivity options, consider layered approaches—combining wired stability with wireless flexibility can elevate your diy vr headset to new heights of performance and comfort.
Step-by-Step Guide to Building a Custom VR Headset
Design Planning – Sketches, measurements, choosing hardware
Embarking on a vr headset diy project begins with meticulous design planning. It’s not just about assembling parts; it’s about visualizing an immersive experience tailored to your needs. Start by sketching out your concept, capturing every detail of the headset’s shape, fit, and aesthetics. Precise measurements of your head, distance between eyes, and space for hardware components are essential to ensure comfort and functionality. This phase transforms your ideas into tangible blueprints, guiding the entire build process.
Choosing the right hardware is the next critical step. For a successful vr headset diy, selecting quality display technologies such as LCD, OLED, or AMOLED screens can significantly affect visual clarity and immersion. Additionally, consider the type of lenses—whether Fresnel or aspherical—that will influence field of view and comfort. Careful alignment of these elements ensures a seamless virtual experience, making your customized VR headset both functional and comfortable to wear for extended periods.
Acquiring Components – Sources and specifications
Building a custom VR headset isn’t merely about sourcing parts—it’s an expedition into the realm of engineering artistry. To ensure your vr headset diy project reaches its zenith, start by meticulously acquiring the right components. From high-quality display screens like LCD, OLED, or AMOLED to precision-crafted lenses, every element must harmonize to create a seamless virtual universe. The importance of selecting specifications tailored to your needs cannot be overstated; a poorly chosen display or lens can shatter the immersion you seek.
Sources for these components range from specialized electronics suppliers to online marketplaces dedicated to DIY enthusiasts. When selecting hardware, focus on compatibility and durability. For example, a 5.5-inch AMOLED display paired with aspherical lenses and adjustable straps will enhance both comfort and visual fidelity. Consider the following essential elements for your vr headset diy:
- High-resolution display technology
- Quality lenses for optimal field of view
- Precise sensors like gyroscopes and accelerometers
- Reliable connectivity interfaces such as USB or HDMI
Careful attention to specifications ensures your crafted device not only functions flawlessly but also offers an immersive experience worthy of the most seasoned virtual explorers. As you gather components, remember that each piece is a portal—an essential fragment in your quest for a truly bespoke VR adventure.
Assembling the Frame – Tools and techniques
Embarking on the journey of assembling a VR headset diy is akin to sculpting a masterpiece from raw, uncharted material. The frame, often overlooked, is the very skeleton that holds your virtual dreams aloft. To craft this foundation, a steady hand and an eye for precision are paramount. Begin with durable materials—laser-cut acrylic, lightweight plywood, or 3D-printed polymers—each offering a canvas for your creativity.
Tools of the trade become your allies: a rotary tool for shaping, a soldering iron for delicate connections, and clamps to hold your vision steady. Techniques such as careful sanding, measuring twice before cutting once, and test-fitting components ensure a seamless assembly. Remember, the goal is a snug yet comfortable fit, one that invites prolonged journeys into virtual worlds.
As you progress, consider integrating a step-by-step guide to building a custom VR headset. An ordered approach—perhaps starting with the structural frame, then moving to mounting the display, and finally securing the lenses—ensures each phase unfolds with clarity and purpose. The harmony of craftsmanship and technology culminates in a craft that is not merely functional but a true extension of your imagination.
Indeed, meticulous assembly transforms a collection of disparate parts into an immersive portal—an artful symphony of engineering and artistry, all within the realm of your own creation. This is the essence of vr headset diy; a testament to ingenuity that bridges the digital and physical, forging the gateway to endless virtual adventures.
Integrating Displays and Lenses – Placement, securing, calibration
When integrating displays and lenses into your vr headset diy masterpiece, precision becomes the architect of immersion. The placement of screens—be it LCD, OLED, or AMOLED—must be meticulously calibrated to align seamlessly with the lenses, ensuring a distortion-free virtual vista. This stage demands patience; slight misalignments can shatter the illusion, reminding us that craftsmanship in virtual reality is as much about subtlety as it is about technical prowess.
To achieve perfect harmony, securing the displays and lenses involves a delicate balance. Use adjustable mounts or custom brackets to fine-tune positioning. The lenses should sit just a few millimeters from the display, allowing for a wide field of view while minimizing edge distortion. Remember, calibration isn’t a one-time affair. Continuous adjustments—rotating, shifting, testing—are vital in refining the experience, especially for those engaged in vr headset diy projects aimed at comfort and clarity.
Calibration extends beyond physical placement. It encompasses software adjustments—focusing, convergence, and interpupillary distance (IPD)—which collectively enhance visual fidelity. Employ calibration tools or custom scripts to iterate through different settings until the virtual world feels natural and immersive. This process elevates your vr headset diy from a mere assembly to a personalized portal, where every pixel and lens angle is tailored to your unique perception, forging a truly bespoke virtual journey.
Adding Sensors and Tracking Modules – Setup and configuration
Building a custom VR headset isn’t merely a task; it’s an odyssey into a realm where technology dances with artistry. When adding sensors and tracking modules, the real magic begins—transforming static screens into portals of immersive exploration. The setup and configuration of these components demand meticulous attention, for it is through precise calibration that your VR headset diy breathes life into the virtual universe.
Start by choosing high-quality gyroscopes and accelerometers—these are the vigilant sentinels of motion, capturing every tilt and turn with unerring fidelity. External tracking systems, such as infrared sensors or lighthouse modules, can elevate your project, creating a symphony of spatial awareness. Connecting these elements involves a delicate choreography: ensure your sensors are securely mounted and correctly oriented, aligning with your headset’s geometry.
- Secure mounting brackets
- Accurate sensor placement
- Calibration software
Once physically installed, the true artistry unfolds in the software realm. Fine-tune the tracking parameters—adjust sensitivity, drift correction, and latency—to forge a seamless dance between the physical and virtual worlds. This process resembles tuning a musical instrument; each adjustment resonates, shaping an experience where movement feels natural and intuitive. Embracing the iterative nature of this task, test your setup repeatedly, refining until the virtual environment responds as effortlessly as thought itself.
Software and Firmware – VR platform compatibility, driver installation
Building a custom VR headset is a venture that demands both precision and passion—an intricate dance between engineering and artistry. Once you’ve assembled the hardware, the next essential step involves software and firmware setup, which can make or break your vr headset diy project. Compatibility with various VR platforms ensures that your creation doesn’t just work in isolation but integrates seamlessly with the immersive ecosystems you desire. This process begins with selecting the right operating system—whether it’s SteamVR, Oculus, or OpenXR—and ensuring your hardware drivers are up to date.
Installing the correct drivers is crucial. They act as the vital bridge, translating the sensors’ signals into commands understood by your software. For optimal performance, verify that your graphics card and USB interfaces are fully compatible, avoiding latency or recognition issues that could hinder immersion. Once drivers are installed, it’s wise to run calibration tools provided by the platform or third-party software. These tools help fine-tune sensor responsiveness and ensure your vr headset diy responds fluidly to every tilt and turn, creating a convincing virtual experience.
Moreover, consider the importance of firmware updates—these often contain enhancements that improve tracking stability and overall system robustness. Some platforms offer dedicated configuration utilities that guide you through pairing sensors and adjusting tracking zones. Employing these tools ensures your sensors and tracking modules operate harmoniously, forging a seamless bridge between the physical and digital realms. With every step, your meticulous attention transforms a raw collection of parts into a fully functional portal into virtual worlds—an epitome of ingenuity and determination that defines the essence of a vr headset diy.
Software Setup and Calibration for DIY VR Headsets
Installing VR Software Platforms – SteamVR, Oculus SDK, OpenVR
Embarking on a vr headset diy journey demands meticulous software setup and calibration — the sacred rites that transform raw components into an immersive portal. Once your hardware is assembled, installing the right VR software platforms becomes paramount. These platforms—SteamVR, Oculus SDK, and OpenVR—act as the neural network, translating your intentions into virtual reality experiences with fluidity and precision. Each offers unique calibration tools that fine-tune tracking, latency, and display alignment, ensuring an experience that feels seamlessly real.
To streamline this process, consider following a structured sequence: first, install the core platform, then update drivers, and finally execute calibration routines. For instance, with SteamVR, calibration involves defining your play space, adjusting sensor placement, and verifying tracking accuracy through visual cues. This step is crucial in a vr headset diy project, as it bridges the gap between hardware craftsmanship and software precision, ultimately delivering a compelling virtual journey.
Configuring Sensor and Head Tracking – Calibration tips and troubleshooting
Calibrating sensor and head tracking is the linchpin of a successful vr headset diy project. Precise setup ensures that your virtual environment responds naturally, making the experience truly immersive. Sensors like gyroscopes and accelerometers must be fine-tuned to track head movements accurately. Small misalignments can result in latency issues or disorienting lag, breaking the illusion of virtual reality.
To optimize sensor calibration, start by securing sensors firmly within your headset frame. Next, run the calibration routine provided by your chosen VR platform, such as SteamVR or OpenVR. Often, this involves defining your play space and adjusting sensor positions until tracking visuals align perfectly with real-world movements. Troubleshooting common issues—like tracking flicker or drift—may require repositioning sensors or recalibrating the software. Remember, a well-calibrated vr headset diy isn’t just about hardware; it’s about syncing software and sensors for seamless motion detection.
For best results, always verify tracking accuracy through visual cues. A simple tip: perform a head turn and observe if the virtual environment mirrors your movement instantly. If inconsistencies remain, revisit your sensor placement, ensure firmware is updated, and re-execute calibration routines. Mastering this step transforms a collection of components into a truly functional and immersive VR headset.
Testing and Debugging – Ensuring responsiveness and accuracy
In the realm of creating a vr headset diy, software setup and calibration serve as the enchanted keys to unlocking seamless responsiveness and pinpoint accuracy. Once the hardware components are assembled, the journey shifts to configuring the underlying software—an intricate dance that transforms raw sensors into a symphony of motion. Ensuring that your VR platform, whether SteamVR or OpenVR, is correctly installed and updated is the first step toward flawless operation.
Next, calibration routines are essential. These routines often involve defining your play space and fine-tuning sensor positions to match real-world movements with virtual responses. To verify calibration success, perform a series of head turns and observe if the virtual environment mirrors your movements with instant clarity. Troubleshooting common issues like tracking flicker or latency can be as simple as adjusting sensor angles or re-running calibration procedures. Remember, a well-calibrated vr headset diy hinges on meticulous software configuration, making your virtual world come alive with precision and fluidity.
For optimal performance, consider running diagnostic tests within your VR platform. Many systems offer visual cues or status indicators—use these to identify misalignments or software glitches swiftly. With patience and a keen eye for detail, you can craft a truly immersive virtual experience that responds as naturally as breathing, turning your diy project into a portal to endless adventure!
Optimizing Performance – Latency reduction and graphical settings
Optimizing performance for your vr headset diy is the secret sauce to immersing yourself in virtual worlds with minimal latency and crystal-clear graphics. Once your hardware is assembled, the real fun begins—fine-tuning the software setup and calibration. Ensuring your VR platform, whether SteamVR or OpenVR, is up-to-date lays the foundation for seamless operation and fewer headaches down the line.
Reducing latency is crucial—no one enjoys a virtual rollercoaster that lags behind real-world movements. Adjust your graphical settings to strike a fine balance between visual quality and smooth responsiveness. Many DIY enthusiasts find that lowering resolution slightly can drastically improve responsiveness without sacrificing immersion. For a smoother experience, consider tweaking the refresh rate and rendering options, which can be done within your VR software’s settings menu.
Sensor calibration plays a pivotal role. Perform routine calibration routines—defining your play space, aligning sensors, and verifying their positions—to ensure that your vr headset diy responds instantly to head turns and body movements. Regular diagnostic tests within your platform help identify misalignments or software glitches early, saving you from virtual nausea or motion sickness. Remember, meticulous software configuration transforms your DIY headset into a portal of endless adventure!
Advanced Tips and Customizations
Upgrading Display and Lenses – Enhanced optics for better immersion
Enhancing your vr headset diy project with upgraded display and lens components is where true immersion begins. By opting for high-quality OLED or AMOLED displays, you can significantly reduce motion blur and improve color accuracy, creating a more lifelike virtual environment. The choice of lenses is equally critical—opt for aspheric or fresnel lenses to minimize distortion and maximize field of view. Customizing these elements allows for a tailored experience that aligns perfectly with your visual preferences and hardware setup.
For those seeking a more refined visual experience, consider experimenting with different lens configurations. An innovative approach involves adjusting the distance between the lenses and the display, which can dramatically enhance clarity and reduce eye strain. If you’re comfortable with detailed modifications, adding an anti-reflective coating or upgrading the lens housing can further elevate the visual fidelity of your vr headset diy. Remember, the key to achieving optimal immersion lies in meticulous calibration and alignment of these advanced optics—small tweaks can make a world of difference in how you perceive virtual worlds!
Modifying Fit and Comfort – Padding, adjustable straps, weight balancing
When embarking on a vr headset diy journey, adjusting the fit and comfort isn’t just a luxury—it’s essential for prolonged immersion. Small tweaks, like adding plush padding or selecting breathable materials, can transform the experience, making it feel like the headset was custom-made for your face. A snug yet comfortable fit ensures your movements are tracked accurately and reduces fatigue during extended use.
Equally important are adjustable straps and weight balancing. Strategically positioning the weight distribution prevents neck strain and improves overall comfort, allowing you to fully lose yourself in virtual worlds. For a tailored touch, consider experimenting with different strap configurations—some prefer a single, wide strap, while others favor a multi-point harness for extra stability.
- Padding thickness and material
- Strap adjustability and placement
- Weight distribution techniques
In the realm of diy vr headset customization, fine-tuning these elements can elevate your experience from ordinary to extraordinary, ensuring every virtual adventure feels seamless and effortless. After all, the magic of a well-fitted VR headset lies in the harmony between hardware and human comfort—making each moment in VR feel more immersive and less intrusive.
Integrating Audio – Built-in speakers, external earbuds
Integrating audio into your vr headset diy project can dramatically elevate the immersion factor. Built-in speakers offer a sleek, space-saving solution, seamlessly blending sound with visuals. However, many enthusiasts find that external earbuds or headphones provide a richer audio experience, allowing for greater sound clarity and directional cues. When customizing your vr headset diy, consider how each audio option aligns with your virtual environment and personal comfort.
For those seeking a tailored audio setup, experimenting with different configurations can make a noticeable difference. You might opt for a simple, integrated speaker system or go all-in with external earbuds that can be easily swapped or upgraded. This flexibility is one of the key benefits of building a DIY vr headset, allowing you to fine-tune every sensory input for maximum realism.
Some advanced builders even incorporate customizable audio ports or dedicated channels to synchronize sound effects with visual cues, heightening the sense of presence. Whether you prefer the convenience of built-in speakers or the precision of external earbuds, ensuring high-quality sound integration is crucial for achieving that seamless virtual reality experience. In the realm of vr headset diy customization, thoughtful audio integration transforms the headset from a mere device into a portal to another world.
Adding Wireless Capabilities – Bluetooth, Wi-Fi modules
Adding wireless capabilities to your vr headset diy project transforms the entire experience, freeing you from cumbersome cables and enhancing immersion. Incorporating Bluetooth or Wi-Fi modules allows for seamless data transmission, enabling you to move freely within your virtual environment. This upgrade not only improves comfort but also opens avenues for connecting wireless controllers and external sensors, creating a more intuitive interface.
For those venturing into advanced customization, experimenting with different wireless modules can yield notable improvements. Consider integrating Bluetooth 5.0 for reliable low-latency sound and controller connectivity, or Wi-Fi 6 for high-speed data transfer, especially if you’re streaming high-resolution content. The key lies in selecting hardware that aligns with your desired performance and compatibility.
- Identify the appropriate wireless module based on your project’s requirements.
- Ensure your firmware supports the chosen wireless technology for smooth operation.
- Position antennas carefully to maximize signal strength and minimize interference.
Incorporating these wireless features into your vr headset diy demands a nuanced understanding of hardware integration and software configuration. Yet, the reward—a truly untethered virtual reality experience—is worth every effort. It’s a testament to the endless possibilities when DIY enthusiasts push the boundaries of what’s achievable in virtual reality customization. Ultimately, wireless capabilities elevate your VR headset from a basic device into a portal that respects your space and freedom, echoing the very essence of immersive technology.
Safety and User Experience Tips
Ensuring Proper Fit and Fit Adjustments – Preventing discomfort and strain
Creating a comfortable and safe VR headset DIY experience isn’t just about the tech—it’s about the user’s well-being. Imagine hours immersed in virtual worlds, only to be met with discomfort or strain—that ruins the experience faster than a glitch in the matrix. Proper fit and fit adjustments are paramount. A snug yet breathable fit helps prevent fatigue and potential headaches, especially during extended sessions. Adjustable straps and padding are your allies in this quest, allowing users to tailor the headset to their unique head shape. Prioritize comfort above all else, because even the most advanced VR headset DIY setup falls flat if it’s causing strain.
In addition, consider the weight distribution of your build. Uneven weight can lead to neck strain, reducing immersion and increasing fatigue. For safety, ensure all components are securely mounted and that cables are managed to prevent tripping hazards. Remember, a well-fitted DIY VR headset isn’t just about immersion—it’s about safeguarding the user’s experience and health. When fine-tuning fit adjustments, always test for comfort, responsiveness, and stability, making modifications as needed to prevent discomfort from creeping in unnoticed. After all, the goal is seamless virtual journeys, not real-world aches and pains.
Managing Motion Sickness – Best practices during use
As virtual worlds beckon with boundless promise, managing motion sickness during your vr headset diy journey transforms from a mere precaution to a vital art. The immersive allure of VR can be intoxicating, yet it also holds the potential to unsettle even the most seasoned explorers. The key lies in understanding how your brain and eyes interact within this digital tapestry—an intricate dance that, if misaligned, can lead to nausea or disorientation.
Practical measures include taking regular breaks and gradually increasing exposure time. Ensuring your display refresh rate is high and the frame rate remains consistent can significantly diminish visual lag, a common culprit behind motion sickness. It’s also wise to calibrate your sensors meticulously, so head movements translate smoothly and accurately. For an enhanced experience, consider introducing gentle vestibular exercises or adjusting the field of view to reduce peripheral motion that may trigger discomfort.
In the realm of vr headset diy, integrating these best practices ensures your virtual escapades remain a source of wonder rather than unease. Remember, comfort isn’t merely an accessory; it is the foundation upon which true immersion is built. Whether you’re adjusting the weight distribution or refining calibration, every detail contributes to a seamless voyage through virtual landscapes. For those crafting their own VR headset, prioritizing user well-being elevates the entire experience—making each session not just a display of technical prowess but a celebration of human connection with the digital frontier.
Monitoring Hardware Heat and Ventilation – Preventing overheating
Certainly! Here’s a compelling, SEO-optimized piece on monitoring hardware heat and ventilation for a VR headset DIY project, crafted with rich detail and engaging prose:
In the labyrinthine world of VR headset DIY, where innovation marries craftsmanship, one often overlooked yet crucial aspect is the management of hardware heat and ventilation. Overheating isn’t merely an inconvenience; it threatens both the longevity of your meticulously assembled device and the immersive experience you seek to craft. As components operate within confined spaces, heat can accumulate rapidly, causing thermal throttling or, worse, hardware failure.
To prevent this, meticulous attention to ventilation becomes paramount. Incorporating strategic airflow channels and selecting materials with thermal conductivity can dramatically mitigate heat buildup. For an enthusiast venturing into a vr headset diy, understanding the nuances of thermal management transforms a fragile prototype into a resilient masterpiece. The delicate dance between compact design and effective cooling demands an attentive eye and an inventive spirit.
Consider integrating passive cooling solutions—such as aluminum heatsinks or heat spreaders—alongside active methods like miniature fans. Here’s a simple yet effective approach:
- Ensure vents are unobstructed and positioned to facilitate natural airflow.
- Place fans in areas where heat tends to concentrate, directing warm air away from sensitive electronics.
- Use thermal paste or pads to improve heat transfer between chips and cooling elements.
Monitoring hardware temperature in real-time during your vr headset diy sessions can be achieved through embedded sensors or software monitoring tools—tools that reveal thermal fluctuations and help fine-tune airflow. Remember, a cool, well-ventilated system not only prolongs the lifespan of your components but also preserves the seamless immersion that makes VR so captivating.
Resources and Community Support
Online Forums and Groups – Reddit, DIY VR communities
Embarking on a vr headset diy journey can feel like venturing into uncharted tech territory — but luckily, the online community support is as vast as the virtual worlds you’ll create. Reddit, in particular, is a treasure trove of enthusiasts eager to share their triumphs and pitfalls. From troubleshooting sensor calibration to selecting the perfect display, these forums are packed with invaluable insights. For those who prefer a more structured approach, DIY VR communities offer step-by-step guides, detailed component lists, and lively discussions that save hours of frustration.
Joining a dedicated online forum isn’t just about troubleshooting; it’s a gateway to inspiration. Many seasoned makers post their custom builds, offering creative tweaks for comfort and performance. If your vr headset diy project hits a snag, these communities often provide quick fixes, ensuring your immersive experience isn’t delayed by hardware hiccups. Whether you’re a seasoned techie or a curious beginner, tapping into these resources can elevate your project from DIY mess to masterpiece.
Tutorials and Guides – Video tutorials, step-by-step articles
In the ever-evolving realm of VR headset DIY, finding comprehensive resources and community support can transform a daunting project into a seamless journey of innovation. Video tutorials and detailed guides serve as invaluable compasses, guiding enthusiasts through intricate assembly procedures and calibration nuances. These step-by-step articles often feature vivid imagery and precise instructions, making complex hardware integration feel almost poetic in its clarity.
For those seeking a more interactive experience, online platforms like YouTube and specialized forums host a treasure trove of tutorials that demystify everything from sensor placement to software configuration. Engaging in these communities reveals a collective wisdom—shared triumphs, lessons learned, and ingenious hacks—that elevates your VR headset DIY project from mere tinkering to a work of art. Whether it’s troubleshooting calibration issues or optimizing display settings, the right resources can save countless hours and frustration, turning your vision into immersive reality.
Some communities even offer curated playlists or modular guides, allowing builders to follow a logical progression tailored to their skill level. This curated approach not only accelerates the process but also fosters a sense of camaraderie among creators. Ultimately, the fusion of expertly crafted tutorials and vibrant community support breathes life into every component, transforming a simple DIY kit into a bespoke portal to virtual worlds.
Source for Parts and Components – Online retailers, electronics suppliers
In the shadowed corners of innovation, sourcing the right parts for your vr headset diy project can feel like navigating a labyrinth of possibility. South African enthusiasts often find their quest for quality components fraught with uncertainty, yet the digital realm offers a clandestine gateway. Online retailers and electronics suppliers serve as the arcane vaults where the most vital hardware—displays, sensors, lenses—can be uncovered. From the sleek OLED screens to the precise gyroscopes, every element demands meticulous selection to summon the perfect virtual portal.
Many builders prefer to forge connections with trusted sources that cater specifically to DIY VR enthusiasts. These suppliers often provide detailed specifications, ensuring each component aligns with the ambitious vision of the creator. For those seeking to elevate their vr headset diy, curated platforms like specialized electronics markets or international retailers become invaluable. They offer not only parts but also a wealth of knowledge—guides, reviews, and community insights—that transform a simple assembly into a rite of digital passage.
- Global electronics giants with dedicated sections for VR components
- Local South African online stores specializing in DIY electronics
- Specialized forums and communities where shared wisdom guides your procurement
Whether you’re sourcing an OLED display or the perfect adjustable strap for comfort, the right resource can turn a daunting task into an exhilarating pursuit. Assembling a vr headset diy masterpiece hinges on these vital connections—each part a piece of the dark puzzle that leads to immersive worlds beyond the mortal realm.

0 Comments